This probably has to be the most frequent question I get in my DM's. It's no secret I love me some Instagram. It is probably my most used social networking app and I can't seem to get enough of it. Now if you follow me on Instagram (here's mine if you've yet to find it) you'll probably have realised by now that I am a caffeine and minimal design addict. I love white spaces, strong contrasts and of course (most importantly) anything that involves coffee!
Now I am certainly no pro Instagrammer but I thought I would answer your questions and share with you all a few tips and tricks I learnt that help me edit my Instagram photos and create my minimal white feed.
Having ambinteriors for over a year now, I have learnt that natural lighting is key. If you are planning on taking any sort of "flat lay" make sure that your setup involves lots of natural lighting. If the sun is out (which it hardly ever is over here in the UK) take advantage of it! Now you're all probably thinking I've just said that there isn't much sun in the UK, how do I still manage to take photos when the lighting isn't that great. Carry on reading and I'll share with you my favourite trick ;)
Lets start of with the filters. I've already setup my flat lay (I'm thinking of doing a video to show you how I set up my photos. If you would like to see that leave me a comment below with some of your suggestions)
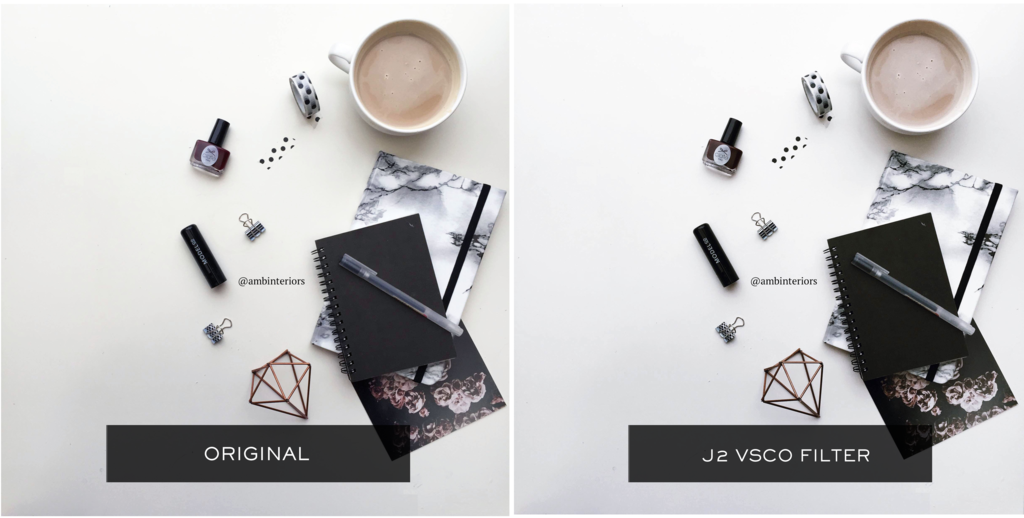
I first start off by uploading my photo into Vsco. I swear by this app and I don't see myself using any other app to edit my pictures. I have tried out several others but I always end up returning to my beloved Vsco. The filter that I use and have been using for a while now is J2. I absolutely love it! (Don't forget if you are trying to create your own style in your feed, consistency is important! Create your own formula and use this with all the photos you edit. Your photos should look like a set. Whether you're into bright colours or your simple monochrome, apply your formula to all your photos and just be creative. Experiment with different filters and settings that best suits your style.)

Now this is my favourite part! When taking pictures on gloomy days you will notice that some parts of your image can be quite dark and shadowy. This step has helped me so much in brightening up certain areas of my photo and removing any unnecessary shadowing or discolouration.

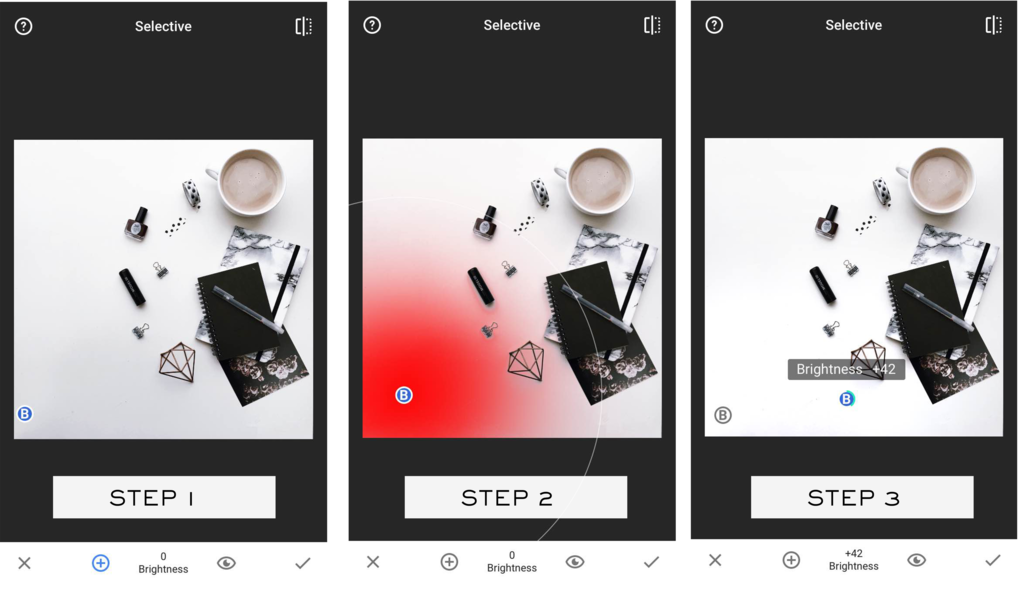
Upload your edited picture into Snapseed and select the "selective" tool. You're then going to place dots in the areas that you would like to brighten. Simply select the "+" to add your "B" (brightness) dots in your image (see step 1)
You are then going to adjust how much of the area you want to alter. As you can see in Step 2 the red colour indicates how much of the image is going to be adjusted. Slide your fingers as if you were to zoom in and out to adjust the size of your alteration.
Once you're happy with the size click on the "B" dot and slide right to increase the brightness or slide left to decrease. Carry out this step to all the dots you have placed.

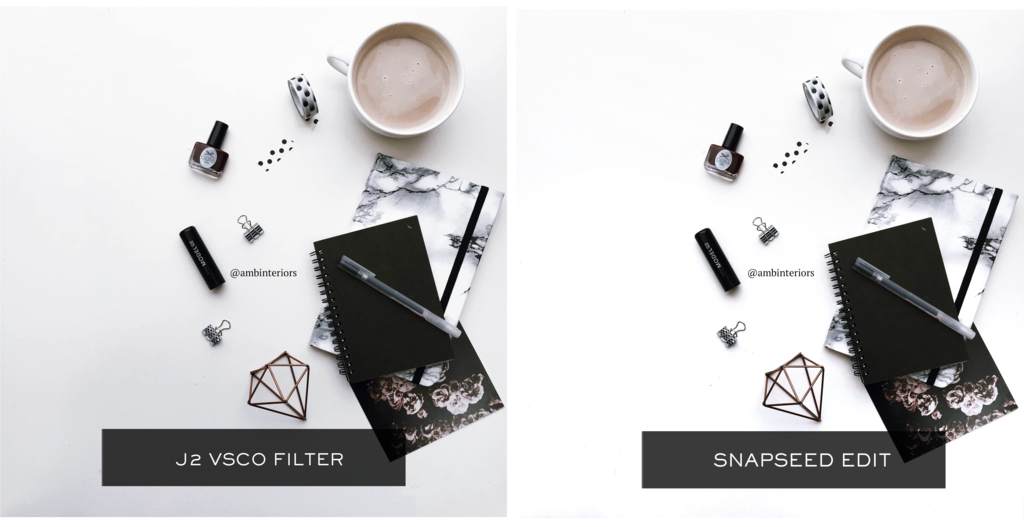
In this case my picture has quite a bit of shadow in the left bottom corner. You can see after altering my image in Snapseed there is a major difference!
Your image is now ready to be uploaded into Instagram.
I don't really do much altering in Instagram. I simply just play around with the saturation levels and sometimes the warmth and that is it really.
And there you have it. My 101 on how I edit my Instagram pictures. I would love to see your edits using my tips and tricks! Simply just tag me in your photo or hashtag #ambinteriors
Stay Gold xo
Buy me a coffee
If you are interested in my designs and would want to see more, a small donation would be great! All payments are secured via Paypal.
Buy me a coffee
If you are interested in my designs and would want to see more, a small donation would be great! All payments are secured via Paypal.
Hi! I found this page through Instagram, and it was really helpful. I would love to watch a video on how you set up your photos! When I try to set up flat lay photo, it never looks as good as I imagine it...
ReplyDeleteThanks, Mon
I am so glad that you enjoyed this post! Thats so lovely to hear. I will defo be making a video for you all. Its all about trial and error. What works, what doesn't. My photos are sometimes coincidental ahaha. Thank you for the lovely feedback and I hope to be making that video very soon!
DeleteStay Gold xo
A really helpful post, thank you for sharing! I've never payed with VSCO & am still finding my way around it, but am yet to try Snapseed. I'm going to download it now & have a play! I love your Instagram, I've been playing around to try to create my own theme but am still working on it, your tips have been very helpful. Xx
ReplyDeleteTania | When Tania Talks
Hello Lovely
DeleteI am really pleased that you liked this post and found it very helpful! I honestly couldn't see myself using any other app and once you find the filter that you like I promise you, you wont ever want to go back. Thank you so much for the lovely feedback! Im hoping to make a on how I set up my images so keep an eye out for that! If you do create something share it with me! I would love to see it.
Stay Gold xo
I'm glad I came across this because I've never heard of snapseed and I needed a way to brighten my photos up better on my phone, thank you for making this post x
ReplyDeleteMollie Victoria Beauty | Blog
And I'm glad I was about to help you in some way. You are more than welcome! x
DeleteIt really is so handy and is such a time saver when editing your photos and getting them to the brightness you want.
Stay Gold xo